2: Needles &
Accessories (cont.)
21.Use
graph paper for placing pattern sequences, motifs or designs. You
need to find knitting graph paper, which has rectangular divisions
instead of squares, because stitches are not square (the width is
more than the height). In fact, although there are many fine
variations, the ratio is approximately three stitches to four rows,
and this applies to most knitting stitches. Garter stitch is the
main exception, as one row lies behind another, and this means that
to match the same length, nearly twice the number of rows have to be
knitted.
Knitting graph paper is usually an eight by ten grid, instead of ten
by ten. I have found pages of blank knitting graphs in some knitting
books. These are a wonderful source.

If you use normal square graph paper, the
numbers will still be correct, and what you knit will be right, but
unless you adjust the design the motif will look short and squat
(see here).
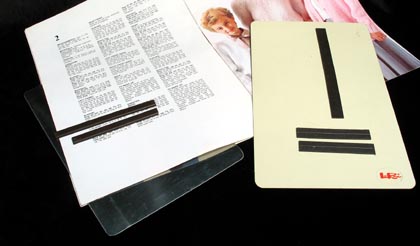
22.
A magnetic board with magnetized strips is a
wonderful help if you are following a complicated pattern. Slip the
board under the pattern page, and place the strips under and above
the section you are working. Move the strips as you progress. This
is also useful if you are embroidering or knitting a design from a
graph. My tip is to work from the bottom of the graph and place the
metal strip above the row that you are working. This will allow to
locate where you are, as you can see what you have done on the
previous row.
NEXT PAGE>>
chapter page: 1 |
2 | 3 |
4 | 5 |
6 | 7 | 8
| 9 | 10 |
11 | 12
|