12: Pockets
(cont.)
On the second row of knitting, increase one stitch on the first
stitch and second last stitch. These stitches allow for the stitch
that form the seams on each side [pic 3].
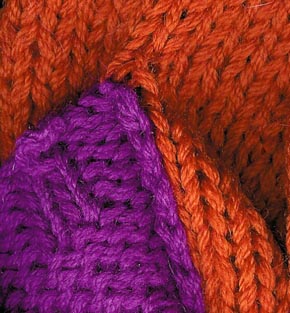
3: The increase stitch marks the corner of the pocket.
The first stitch on each side of the pocket has disappeared into the
seam.
Join the connecting threads between the
first and second stitches from each side of the pocket to the
matching rows of the closest vertical lines on each side of the
pocket [pic 4].
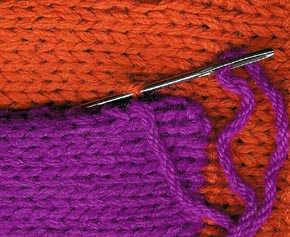
4: Attaching the pocket.
If you have left long ends when picking up
the stitches and casting off the top of the pocket, they are in the
right place to use for attaching the pocket. Join from the base of
the pocket to the top, and then, making sure that the top starts on
the correct row, work the second side seam to the base of the pocket
[pic 5].
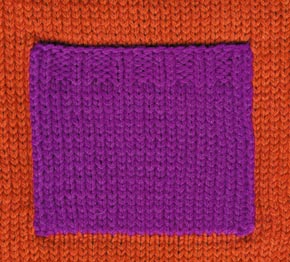
5: The pocket in place: the horizontal and vertical
rows have been followed for the seams and the pocket is perfectly
straight.
When the pocket is a separately knitted
patch, it is worked in almost the same way as a knitted on pocket.
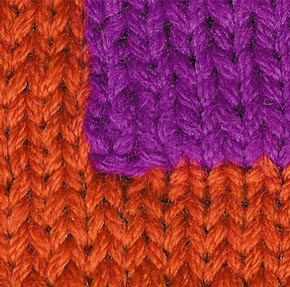
Remember when marking out the shape that a stitch on each side of
the pocket will disappear into the seam [pic 6].
6: The end stitches have been taken up by the seam
inside the pocket.
Starting at the top of the pocket, join row
to row to the bottom of the pocket, then match stitch to stitch
across the base row, then row to row from the base to the top of the
second side of the pocket [pic 7].

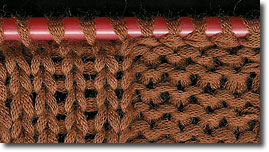
7: Matching stitch to stitch along a horizontal row at
the base of a separately knitted patch pocket.
NEXT
PAGE >> chapter
page: 1 | 2 |
3 | 4 | 5
|