| 21: Vertical Seams
(cont.)
When you have finished the seam, and hopefully
matched all the rows, pull the seam yarn gently until any slack has
gone, then keep pulling the yarn until the seam gathers slightly.
Holding the seam with thumb and finger at the beginning of the seam,
pull so that the seam is stretched fully. This will even up the
stitches and give the seam the same flexibility as the fabric of the
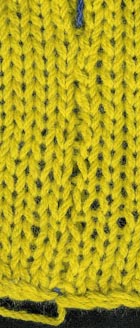
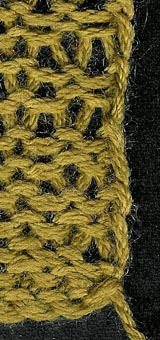
knitting. The seam will match so well that even a contrast joining
thread will not be obvious [pic 5,6].
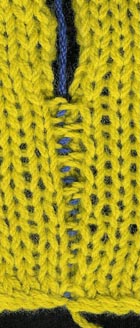
5: (left) The contrast colour shows
the way the seam is joined.
6: (right) Even with a contrast colour, the seam is
virtually invisible when pulled into place.
If the yarn used for the seam is not
attached at the beginning, leave an end to be joined in later and
make sure to hold this end when pulling at the seam.
Keep pulling seams taut and then releasing them as you work. A seam
that is too tight can eventually give way with strain, and will also
distort the shape of the garment.
If the stitches are difficult to see, work over something white, or
look at the pieces against a light source.
If you are carefully matching rows, remember that if you have cast
off a few stitches to start armhole shaping, this will occur one row
higher on one side of the piece than the other. That is because you
cast off the stitches at the beginning of one row, then at the
beginning of the next row. This applies to the sleeve top as well.
---
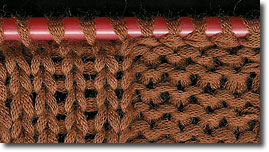
Stocking stitch: purl side facing
Seams worked with the purl side of stocking
stitch as the right side are very easy to join. Gently pull the
fabric vertically and the rows will show up as horizontal ridges.
The lines are made up of little crescent shaped bars, with ends
turned alternately up or down. This bar is the back of the thread
between the stitches of stocking stitch [pic 7].
7: Horizontal bars connecting the first and second
stitch from the edge on purl knitting.
NEXT PAGE >>
chapter page: 1 | 2 |
3 | 4 |
5 | 6
|