| 22: Joining Stitches
to Rows or Rows to Stitches
Stitches are not square. If they were, you could match a row of
stitches to the same number of rows, and the seam would lie flat and
fit together perfectly.
A stitch is always wider than it is high,
and usually, the ratio is that three stitches take up the same space
as four rows. Knowing this, you can work a neat, flat seam if you
join three stitches to every four rows [pic 1].
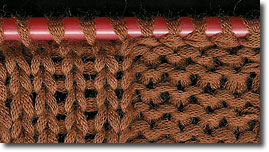
1: Three stitches match four rows when measured, so
eighteen stitches joins perfectly to twenty-four rows.
---
Joining stitches to rows on knit side of
stocking stitch
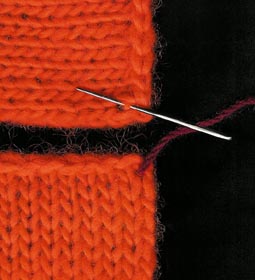
To join stitches to rows knitted in stocking
stitch, position the pieces against each other, with the right side
facing. Hold the piece with the stitches to be joined as the lower
piece. Disregard the cast-on or cast-off edge. Place the threaded
sewing needle under and behind the V of the first whole stitch of
the row below the cast-off row, then pull the yarn through and place
the needle under the thread between the first and second stitches of
the first row to be joined. Pull the thread through to the top and
then work the next stitch and row to be joined in sequence. When you
have done this three times, place the needle under the next stitch
and then miss the next thread between the first and second stitches
of the next row in the sequence, and then pick up the joining thread
of the row after. In other words, miss every fourth row [pic 2,3,4].
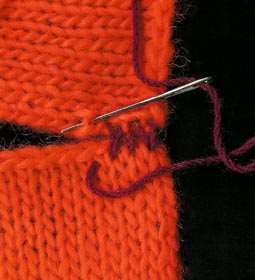
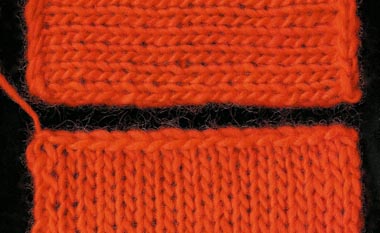
2: (left) Taking thread from first stitch on
bottom piece and first row on top piece.
3: (right) ) Miss every fourth row on top piece.
4: Three stitches fit to every four rows.
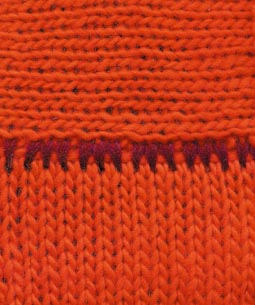
When you have finished the row, tighten and
then release the thread, and you will have a lovely flat seam that
doesn’t pucker or bubble [pic 5].
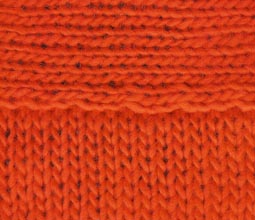
5: The two pieces fit perfectly.
NEXT PAGE >>
chapter page: 1 | 2
|