| 25: Diagonal Hems &
Points (cont.)
If a garment is knitted from the top, the way
to make a point is to cast off a number of stitches at the beginning
of every row until there are no stitches left. If knitting the
conventional way (from hem to shoulder), start with a few stitches
and then cast on a few stitches at the beginning of every row [pic
5].
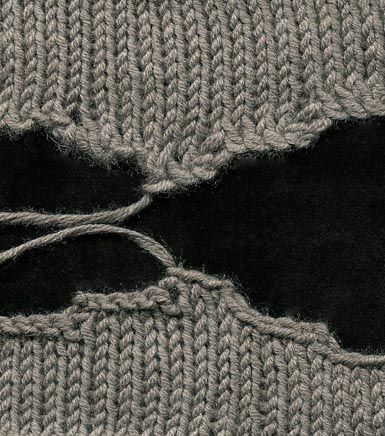
5: Top: Steps formed by casting on a
few stitches at the end of every row. Bottom: Steps formed by
casting off a few stitches at the beginning of every row.
Either way, the edge is a series of steps,
like a slanted shoulder seam [pic 6].
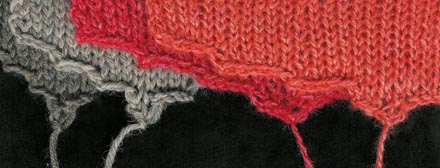
6: The number of stitches in the
steps determines the angle of the slant.
After the garment has been joined, when
picking up stitches to make a band along these edges, ignore the
steps. With right side facing, pick up stitch for stitch along the
edge of the first step. When you come to the next step edge, just
pick up the next stitch in sequence, which is actually two rows
above the last stitch that you have picked up. Continue this way to
the centre of the point or chevron [pic 7,8].
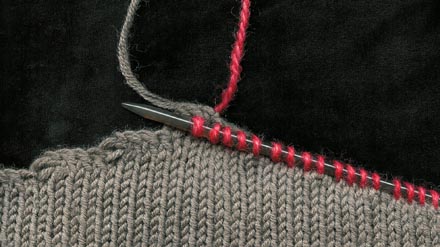
7: Four stitches are picked up to
each step. Every step is two rows above the previous step. Continue
to the middle stitch of the point.
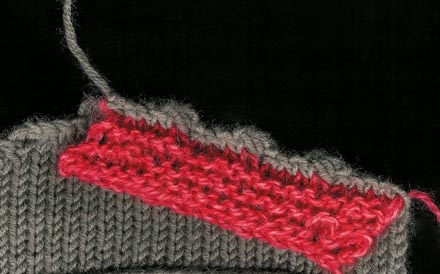
8: The knitted edge folded back to
show how the shaping of the steps has been eliminated.
To shape the angle of the point or the
chevron when the seams are joined, whilst knitting the band increase
one stitch on each end at the point, and decrease one stitch at the
other end [pic 9].
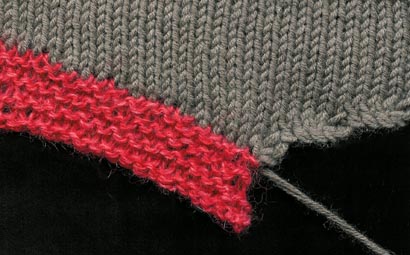
9: The increases at the end of every
second row form half of a mitre corner.
NEXT PAGE >>
chapter page: 1 | 2 |
3
|